
A good hardware CI setup already covers a lot. A BenchPod flashes the build, switches the power, reads the console, emulates the sensors and measures the current. Your test knows the firmware booted, the bus traffic is right and the supply stayed in budget.
What it doesn't know is what the device looks like. Whether the display shows 21.5 °C or 215 °C. Whether the status LED turned green or stayed amber. Whether the screen froze after the update, or came up black because the backlight never switched on. At the end of most release checklists there's still a person at a bench, comparing what they see with what they expect.
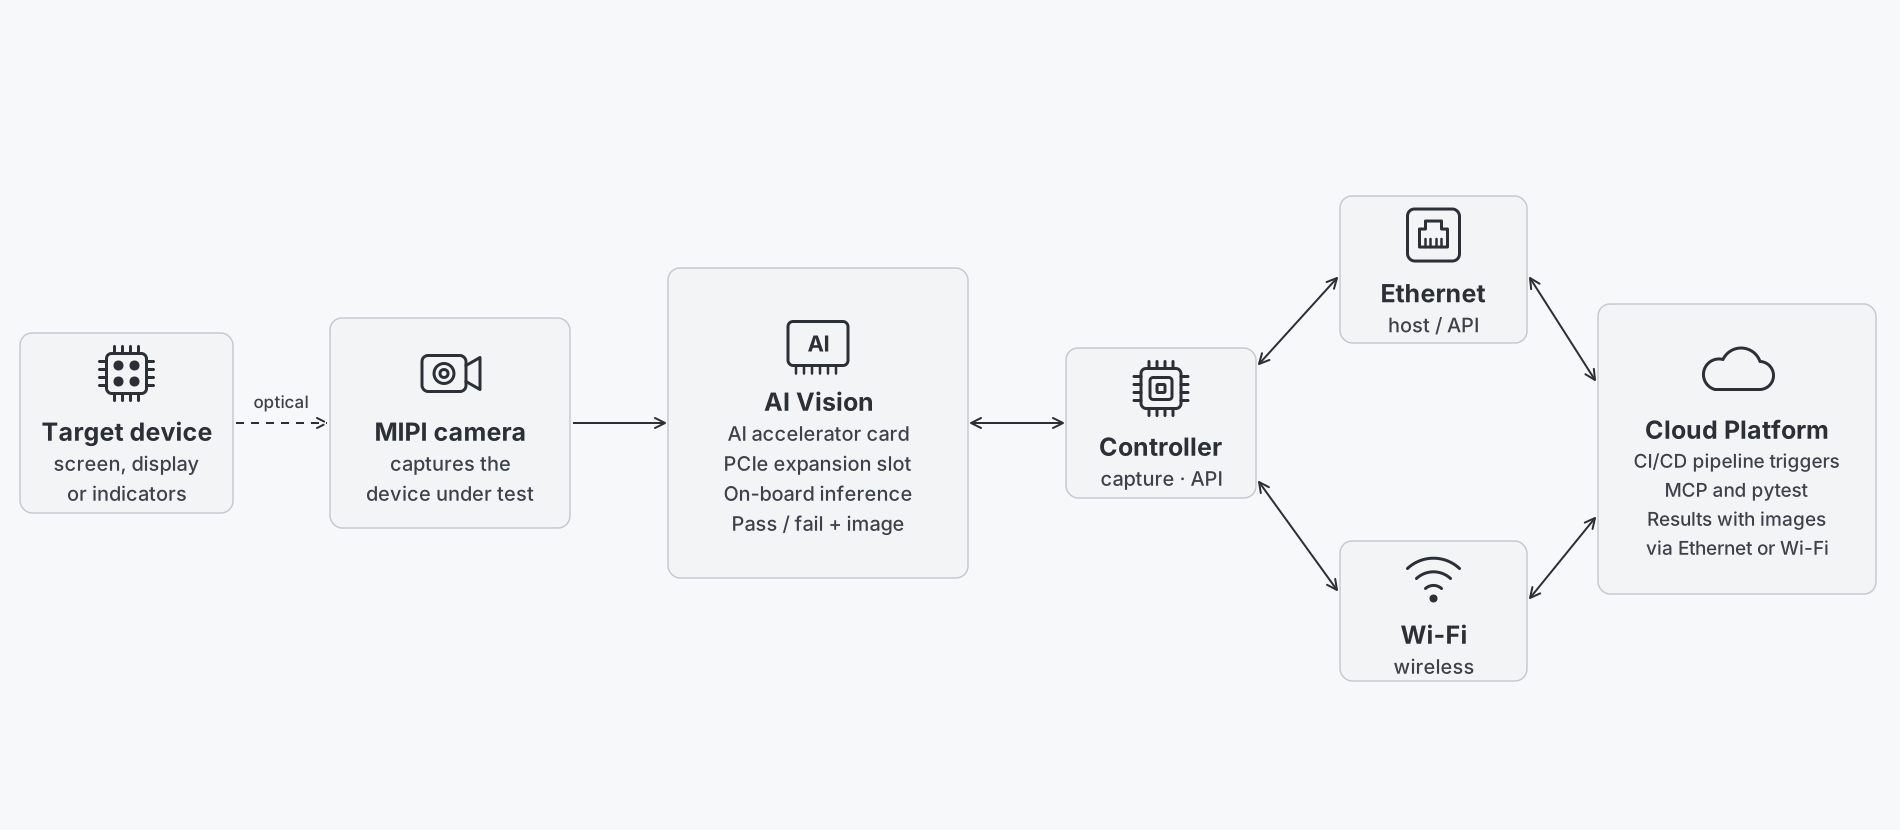
AI Vision, our next product, automates that last step. A camera looks at the screen or the device, a model on the board decides what it sees, and the answer comes back to your test as a pass or a fail, with the image attached.
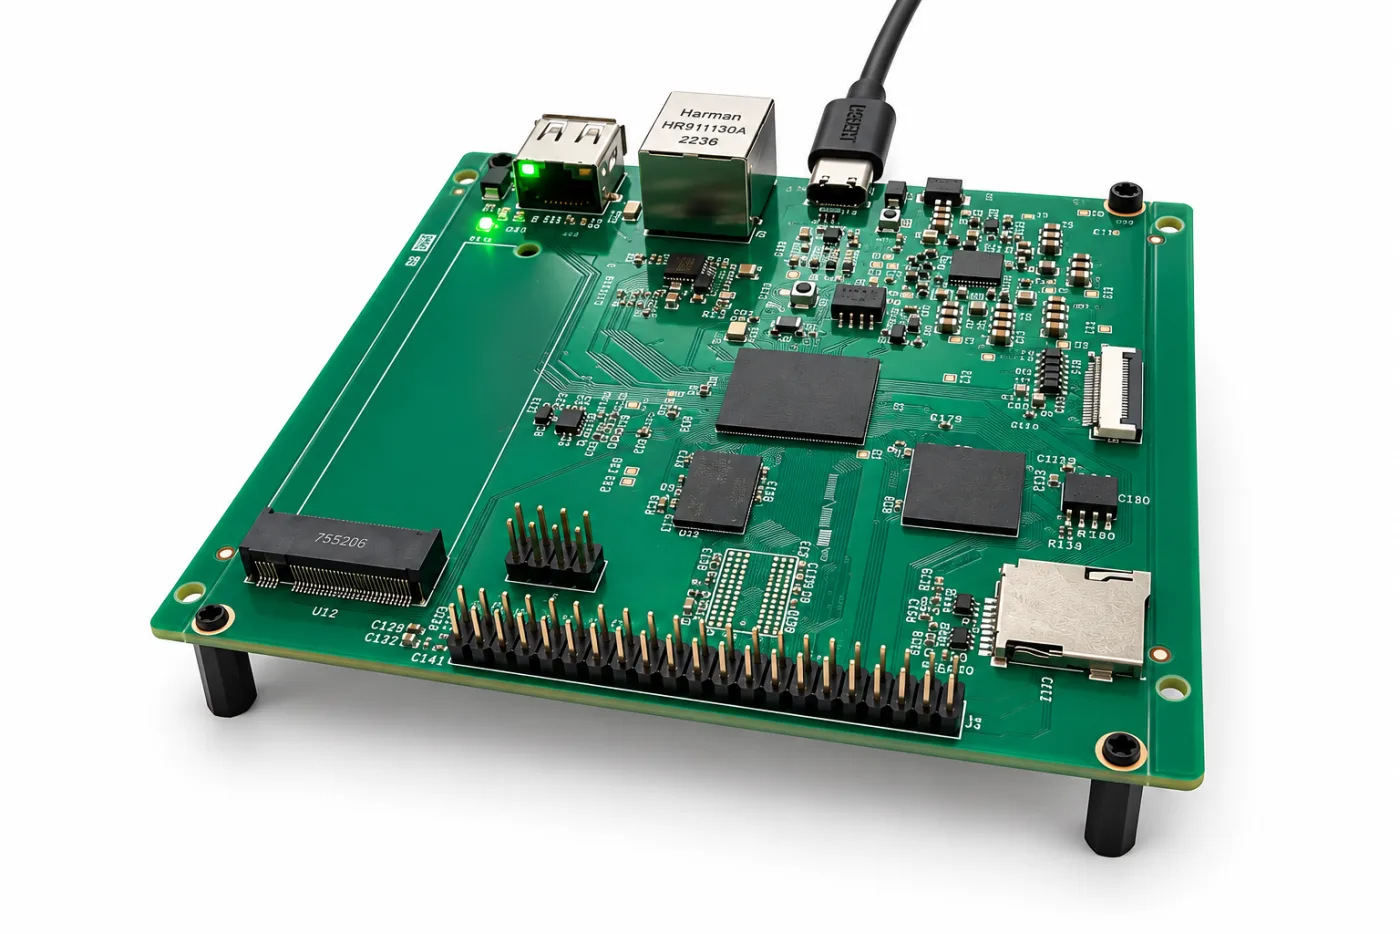
What's on the board
The evaluation board is a small Linux computer built for one job:
- a MIPI camera connector, so you pick the lens and resolution that suit the distance and the detail
- a PCIe expansion slot for an AI accelerator card, which runs the models
- Ethernet and USB to reach your test host and the rest of the bench
Inference runs on the board, so frames of your product never leave your network. That matters when the screen shows something unreleased. You choose the accelerator card that fits your models and your budget.
Bring-up is done: the camera streams and a detection model runs on the accelerator card in real time. The test software is what we're building now, and that's what this article is about.
Filming a screen is harder than it looks
Pointing a camera at a display and running OCR works in a demo. Making it reliable on every commit takes more care, and most of that is the fixture, not the model:
- Screen coordinates, not camera pixels. The camera sees the screen at an angle, maybe rotated. A one-time calibration finds the four corners and maps everything to the display's own pixels, so a test can say "the top bar" or "the button at (1600, 80)", and keep working after you recalibrate a bumped mount.
- Moiré and refresh bands. A camera filming an LCD sees stripes and rolling bands. An exposure matched to the panel's refresh rate, a hood against reflections and a little defocus remove most of them.
- Locked exposure. With auto exposure, a black screen and a white screen both come out gray. After calibration the exposure stays fixed, so "the backlight is dim" becomes something a test can measure.
The checks a test can ask for
Most visual checks in embedded testing come down to a handful of questions, and each one is a function call:
| Question | Check |
|---|---|
| Does the screen show this text or value? | read the text in a region, or wait until it appears |
| Where's the button labeled "Settings"? | find an element by its text or an icon |
| Is this the screen I expect? | compare with a reference screenshot, masking the clock and anything else that changes |
| Is the screen healthy? | not black, frozen, flickering, dim, and no stuck pixels |
| Which screen is this? | identify it against known screens: home, settings, error |
| Did the LED turn green? | the color and state of a region on the device |
The first version leans on text recognition, template matching and reference comparison, which cover most of what people check by eye. Finding UI elements by type (buttons, sliders, popups) comes later, with a model trained for it.
What a test will look like
The Python client goes in the same embeddedci package as the BenchPod SDK, in the same style. The API is still a draft, but a test for a device with a display will read close to this:
from embeddedci.aivision import AIVision
from embeddedci.benchpod import BenchPod, INTERNAL

with BenchPod("192.168.1.213", la_voltage=3.3) as bp, AIVision("ai-vision.local") as vision:
    bp.flash(file="build/app.elf")
    bp.power_on(INTERNAL)

    vision.wait_for(text="Ready", timeout=20)                 # booted to the home screen
    assert vision.screen_health().ok                          # not black, frozen or dim

    bp.set_i2c_sensor(temperature_c=21.5)                     # change what the sensor reports
    vision.wait_for(text="21.5", region="temperature", timeout=3)

    assert vision.compare("home", mask=["clock"]).score > 0.95
That's the whole path from a sensor reading to the pixels a user sees, in one test. A mock-based test stops at the display driver's API and can't get there. When a test fails, the pytest plugin will attach the last frame and the comparison images to the report, the same way the BenchPod plugin attaches the UART log, so you see what the screen looked like, not just that it didn't match.
Pressing buttons
Looking is half of a manual check. The other half is pressing the next button: wait for the home screen, press "Radio", check that FM comes up. AI Vision will do the find-and-press as one step, vision.press(text="Radio"), and hand the actual press to an actuator:
- the BenchPod's GPIO, switching a relay across a physical key
- a message on the bus, like a steering-wheel key sent over CAN by the BenchPod
- an XY stylus for touchscreens
- the device's own debug input, when it has one
The first two need no new hardware, so that's where we start.
Agents can look too
AI Vision joins the BenchPod in the same MCP server. Most tools return results an agent reads as data: the text found, a match score, a pass or a fail. One returns the screen itself, as an image the model can see. That changes what an agent can do on a bench. Ask it to "check that the settings menu still works after this update" and it can flash the build through the BenchPod, look at the screen, decide what to press, confirm the result, and then write the pytest file for what it just did, so the check runs in CI from then on.
When can you try it?
AI Vision is in development. The board works, and the software is being built now, starting with the Python client, the pytest plugin and the first MCP tools. Evaluation boards will be available soon.
If you test a product with a display, an HMI panel or a status LED that someone checks by hand today, we'd like to hear about it: which screens you check, how often, and what "pass" means for you. Join the waiting list on the AI Vision page to be among the first to get a board.